
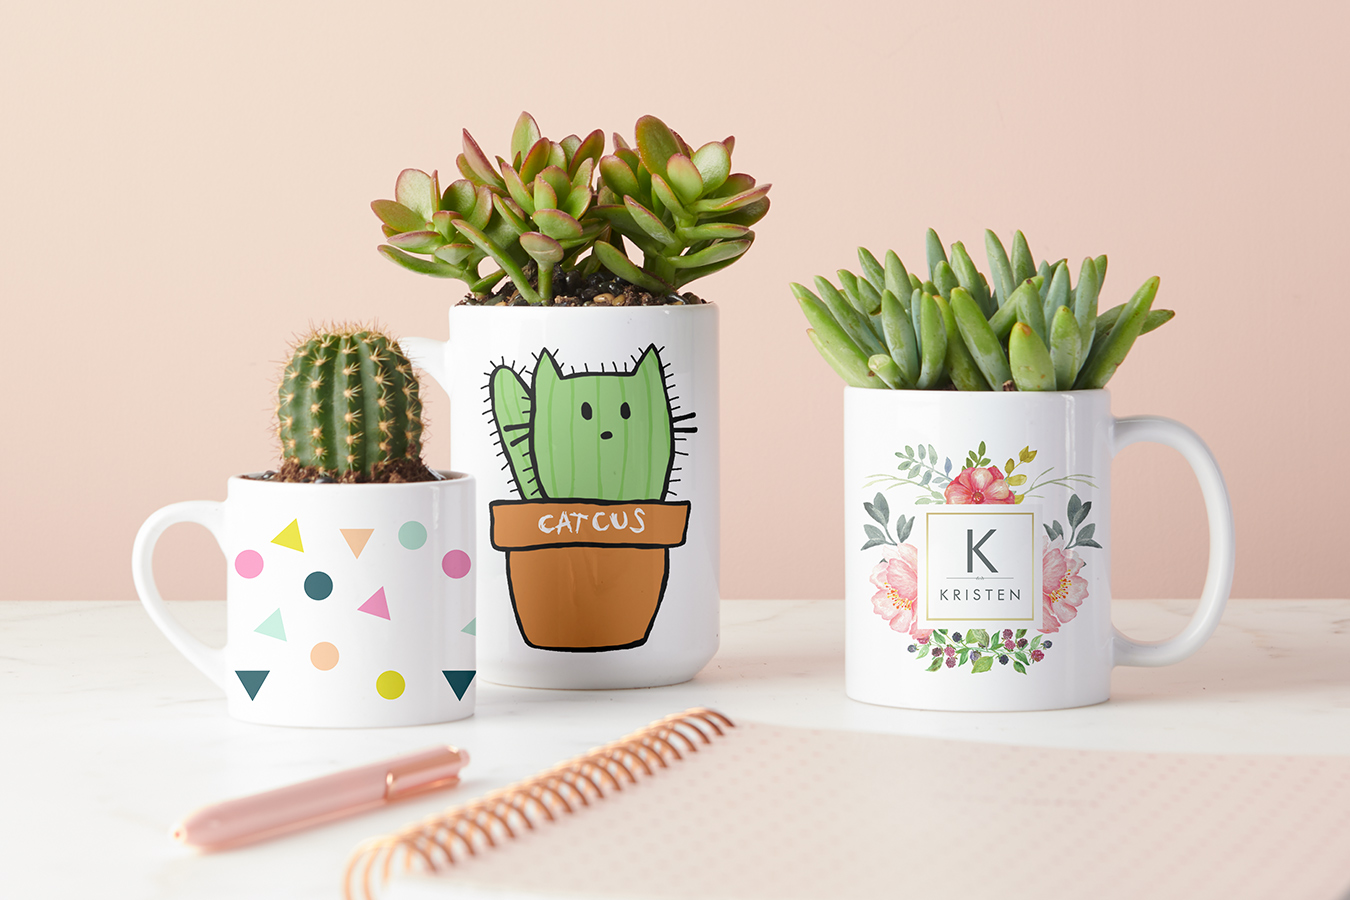
Are you as obsessed with mugs as we are? Are your kitchen cabinets reaching capacity, but your love for collecting mugs knows no bounds? If this is the case, we’ve got a hack that will allow you to keep your collection and show off your favorites. Follow these easy steps to upcycle your mugs, turning them into adorable succulent planters.
Here’s what you’ll need:
- Mugs
- Succulents
- Cactus Soil
- Garden Pebbles
- Small Pebbles or Pea Gravel
- Small Shovel or Spoon
- Water
Designs we used include: Geometric Espresso Mug, Floral Monogram Mug, CATcus Mug
Here’s how you do it:
Time needed: 10 minutes
Grab your supplies and follow these steps to make your own DIY succulent mug planter!
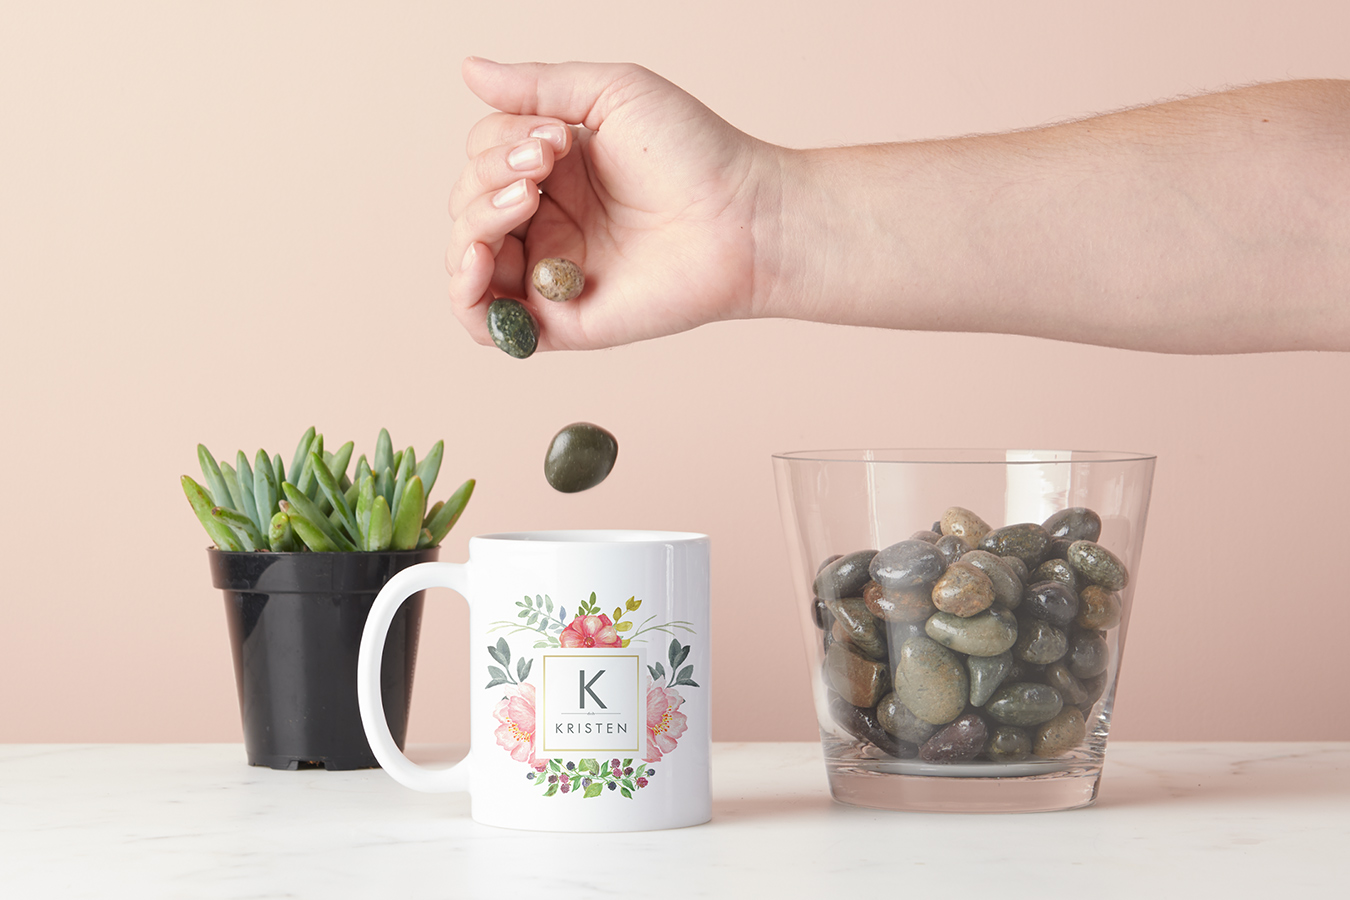
- Pick up some pebbles
Add a handful of garden pebbles, covering the base of the mug. This will assist in water drainage.
- Fill in with soil
Add cactus soil on top of the pebbles/rocks.

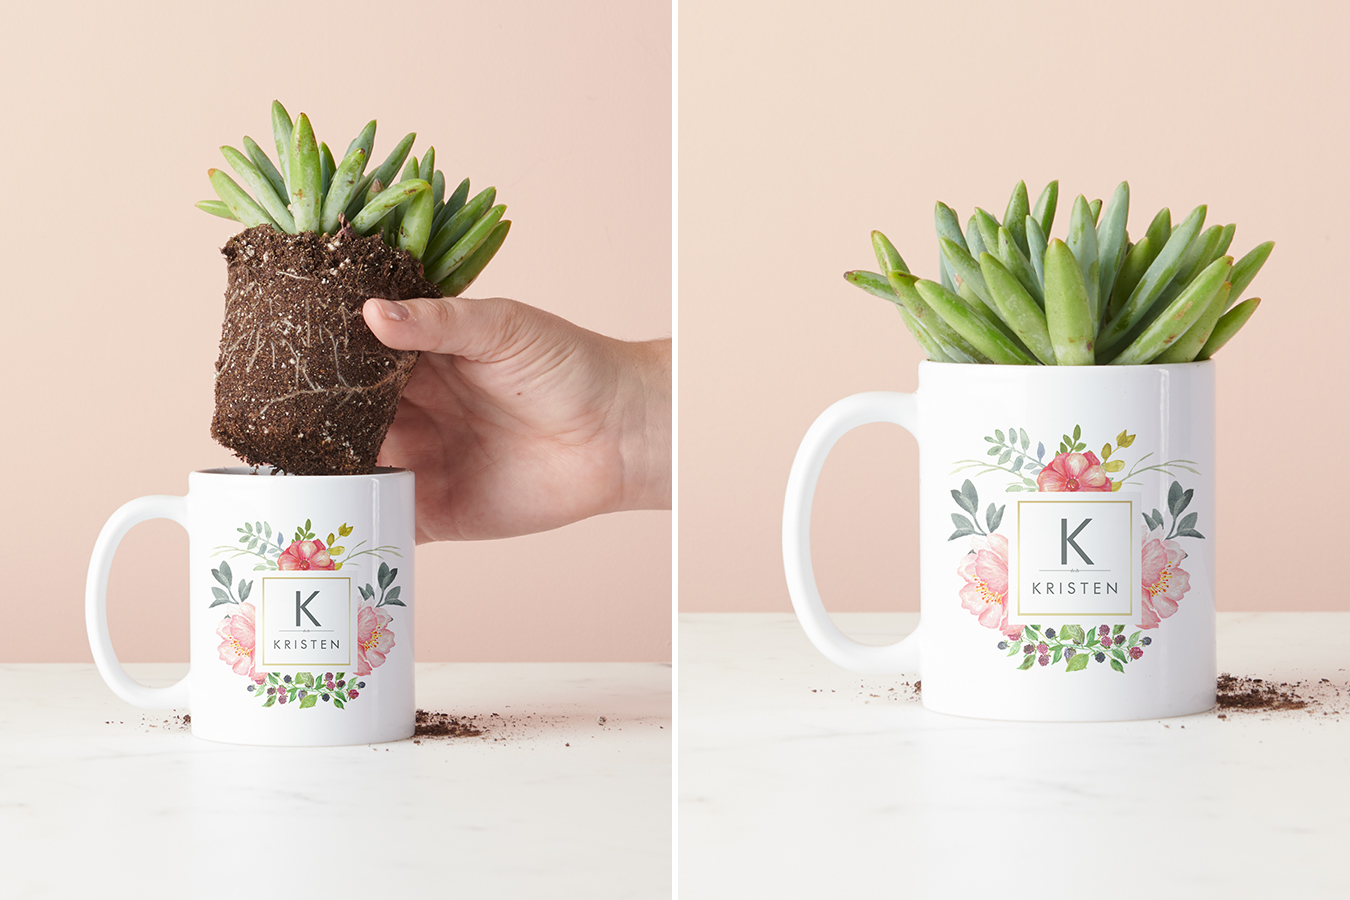
- Add your succulent
Gently remove the succulent and its roots from the plastic container and place it in the mug. If it does not fit initially, delicately remove excess soil from the base or sides.
- Finishing pebble touches!
Add small pebbles or pea gravel to the top of the soil. This not only looks polished, but it also helps reduce soil disruption when watering.

It’s as simple as that! How cute are these happy plants?!
Water your succulents once a week and track their progress. Since these planters don’t have drainage holes it’s important not to overwater them. A good indicator is soil moisture. If the soil is still wet, wait a day or two and check again. Be sure to place your plants in a space where they receive direct sunlight. Succulents love sunny spots!
If you try this DIY project, please share it with us by using the hashtag #zazzlemade on Facebook, Instagram, or Twitter. We love seeing unique uses for our products!
All Photos: Zazzle.com
Jenny is Zazzle’s Associate Art Director. She loves DIY projects and making things with her hands. When she’s not getting crafty, you can find her hosting dinner parties, reading books, or cuddling her cat, Luna.
These are adorable! I have so many extra mugs (face palm) – now I know what to do with them all! 😉
Absolutely BK, I have a cousin who collects a mug from every state they visit. I know she has a green thumb and I can’t wait to tell her about this idea.
I like the idea. There’s something really amusing about being able to walk around with your houseplant (while holding it by a handle). Also, if you’re like me and have a cactus, being able to pick it up from the side would be greatly appreciated. This would also be a cool idea to try with a few small succulents and the soup bowls.
That Catcus mug is pretty great!
I have a serious mug collection and have a great love for all things cactus so this is the perfect project for me. What a fabulous idea collecting one from every state …now planting the state flower in each mug that’s an idea… wow don’t tell my husband I feel another collection coming on. ?
i am looking for southwestern design disposable plastic plates…dinner and salad plates
Hi Michael!
Here is a link to some designs you might like: https://www.zazzle.com/s/southwestern+paper+plates
Hope that helps!
I would love a mug with my Bichon Frise’s picture on it.
Hi Millie!
Here’s a selection of Bichon Frise Mugs: https://www.zazzle.com/s/bichon+frise+mugs
Hope that helps!
This little bit of inspiration and decor is fabulous! Can’t wait to make this. Very unique gifts for any season, any reason. Thank you, Jenny W!
We think so too, Molly! Thanks for your comment!