Here at Zazzle, we deal almost exclusively in personalized products: everything on our marketplace has either been published by an Independent Creator, a member of our talented community of designers, or is a blank template, waiting to be furnished with your own artwork. But while our state-of-the-art design tool and bleeding-edge printing technology is innovative and user-friendly, the concept of personalized products – and of clothing and accessories in particular – isn’t something we came up with, and has its antecedents in the humble embroidered patch.
Yes, custom patches have been used to decorate hats, jackets, bags, and uniforms for hundreds of years, and because we owe so much of our success to the precedent they’ve set, we’ve recently launched them as a new product type on our site. To prepare you for your encounter with our customizable patches, then, we’ve had a deep dive into their history, and have some fun information to share about how they’ve evolved from a clothing repair item to a fashion accessory that’s trending on the catwalks of Paris and Milan! We’re also going to talk you through the various styles and backing available, and explain how to create your very own patch on Zazzle. Read on to learn all about it!
What are patches, and where did they come from?
Before patches were ever used as a fashion statement, they were mainly used to shore up holes in threadbare clothing. However, during the American Civil War, it became common for soldiers to wear patches on their sleeves to identify each other, and to make their rank and station known. Because these patches were being produced by a diverse group of – in general – wives, mothers, and sisters, they lacked consistency, and would have been impossible to standardize. By the outbreak of World War I, on the other hand, and following the Industrial Revolution and the invention of the sewing machine, patches were produced in greater numbers and were worn uniformly.
Military patches continue to be used in the 21st century, and can denote an individual’s experience or participation in a certain tour or mission. Curiously, however, patches also have a counter-military history: during the 1960s and 1970s, they were used among hippie culture to advocate for peace and the protection of nature. Similarly, in the 1980s and among punk culture, patches were worn to support particular bands or spread political messages. Across both counter-culture groups, patches lent their cause a unique, off-beat look.
In the 1990s, patches became more widely available, and were used by kids and adults alike to decorate their t-shirts, backpacks, and tote bags. And in the twenty-first century, cloth labels are once again making a resurgence, and have been used by clothing houses like Gucci, Burberry, and Marc Jacobs on their runway designs.


Why do people wear patches?
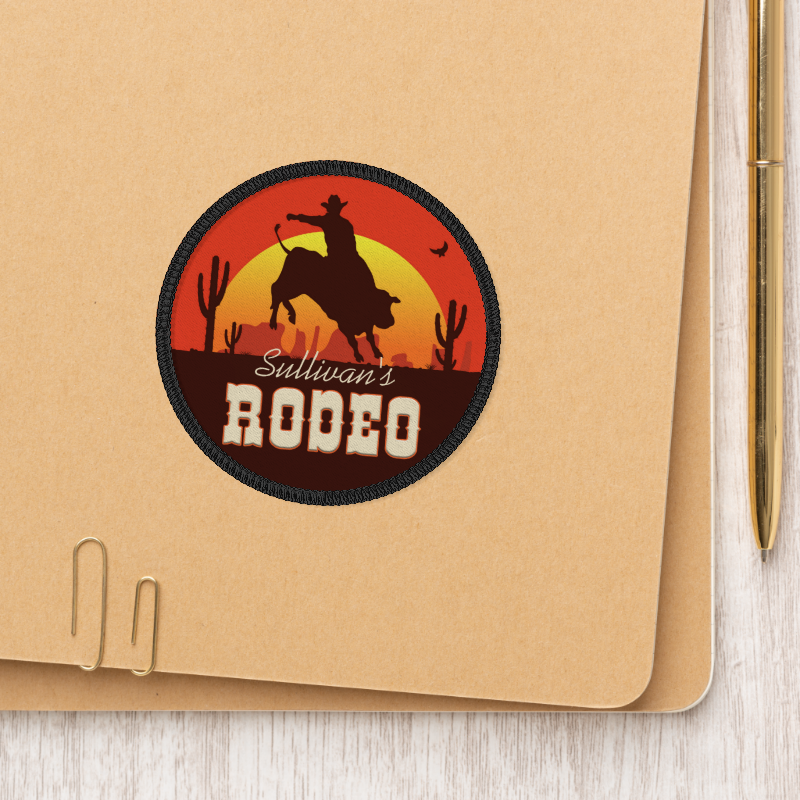
Although we’ve already mentioned some ideas above, there are plenty of other reasons for people to wear patches, and which explain why they’ve remained consistently popular since their invention. For example, patches represent a cost-effective way to market your brand: if you want to add a logo or company colors to an accessory or article of clothing without having to replace said item entirely, you can use a sewn-on label to make your upgrade. Patches are also an excellent way to personalize or enhance products that would be otherwise bare – you could add a pop of color to a plain shirt, or preserve a name or date on a bag or backpack.
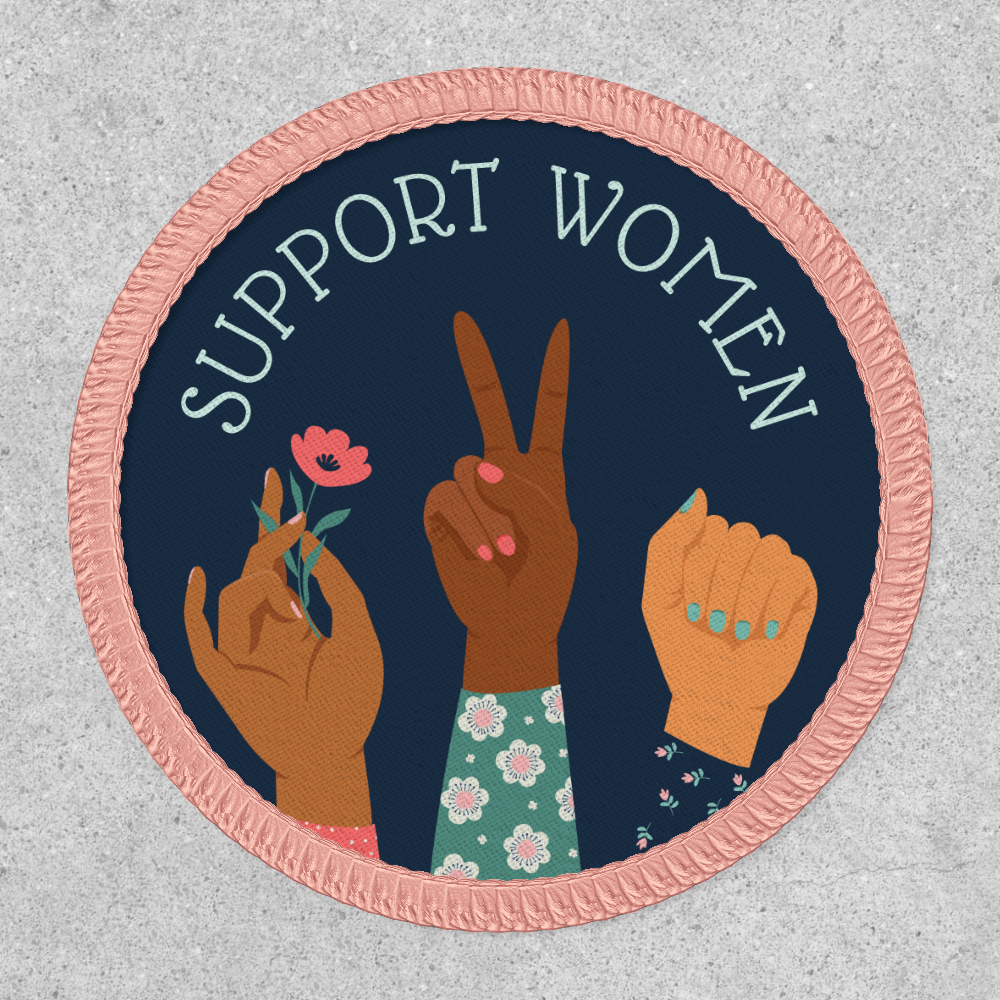
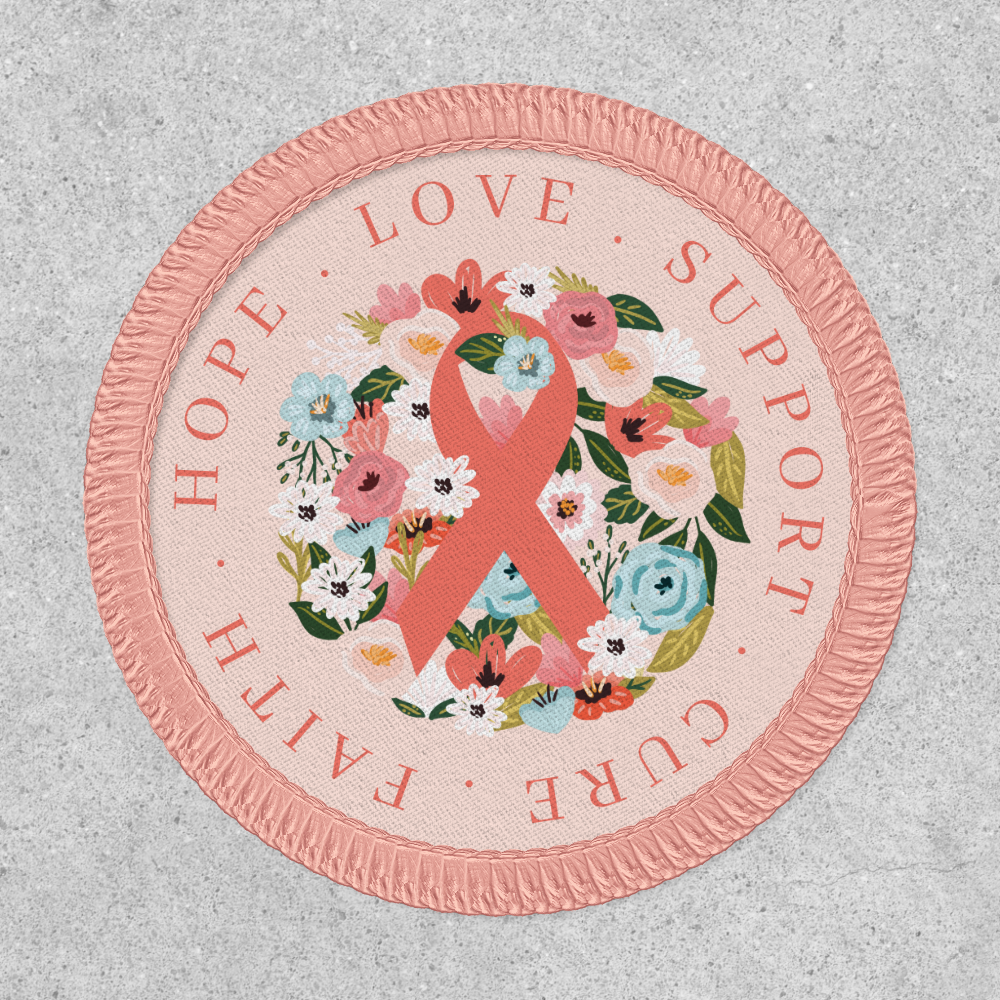
Furthermore, while most people use patches to decorate their clothing or accessories, they’re incredibly versatile, and can be applied to lots of other fabric – a throw pillow, for instance, or a blanket. Because these stitched squares have begun to be treated as a fashion accessory, and because fashion is a form of self-expression, you can also think of patches as a way to say something about your identity – to declare your interest in a particular fandom, or to raise awareness about a certain cause or charity. Finally, in an era of fast fashion and climate change, cloth labels are a way to bolster old, tattered clothing and to practice sustainability.

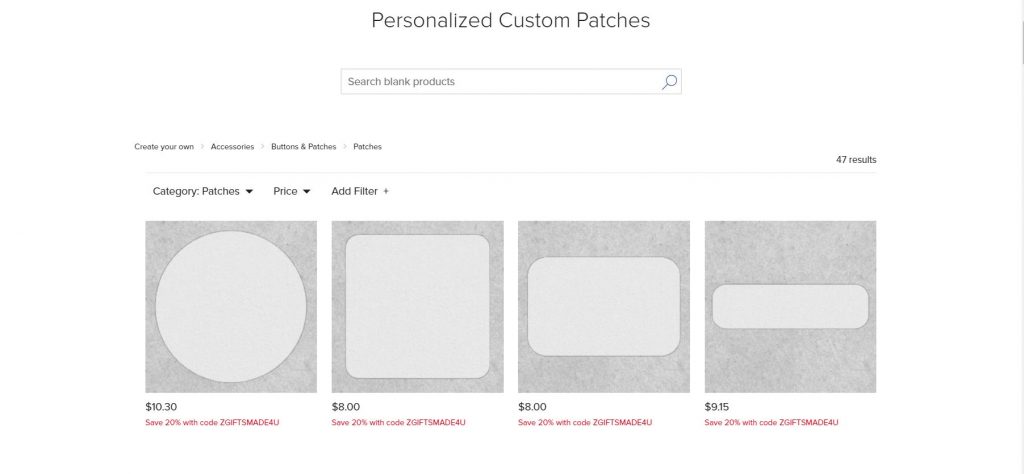
What kind of patch styles are available on Zazzle?
Now that you know why people wear patches, it’s time to think about how to get yourself one! Browse our range of patches on Zazzle, and most of the options and prompts will be self-explanatory, such as the ‘Design Theme’ or the ‘Border Stitching [Color].’ However, there are some drop-down menus that may require elaboration.
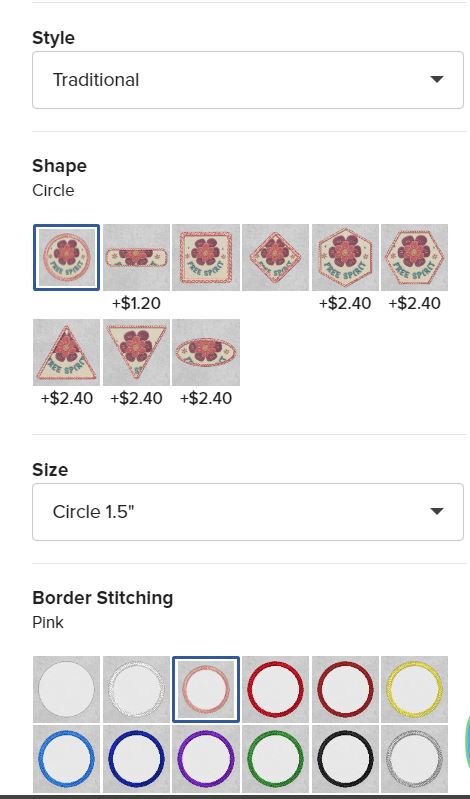
Style
There are two style groupings here: ‘Traditional’ and ‘Modern.’ Traditional refers to the simple geometric shapes that we normally think of when it comes to clothing patches – circles, squares, and diamonds. Modern, on the other hand, yields more unique results, such as a heart-shaped patch and another in the shape of a thought bubble!
Shape and Size
Depending on the style grouping you chose in the previous drop-down, the options here will change. The best way to proceed is by making your selections one by one, descending down the page; in other words, when you’ve settled on a ‘Style,’ then choose a ‘Shape,’ and shrink or enlarge that shape with the ‘Size’ menu.
Backing
This is probably the most important consideration, as it determines how you’ll actually affix the patch to a surface or fabric. The default type of backing is ‘Iron-On’: this means that you need to apply heat – via an iron or heat press – to melt the adhesive and bond the patch to your fabric. ‘Adhesive’ means that the patch will function as a sticker, and that the backing can be peeled off to apply the patch to all kinds of surfaces. Finally, if you choose ‘Velcro,’ then we’ll ship your order with a hook and loop attachment, and the patch will adhere to the Velcro.
How do I personalize a patch on Zazzle?
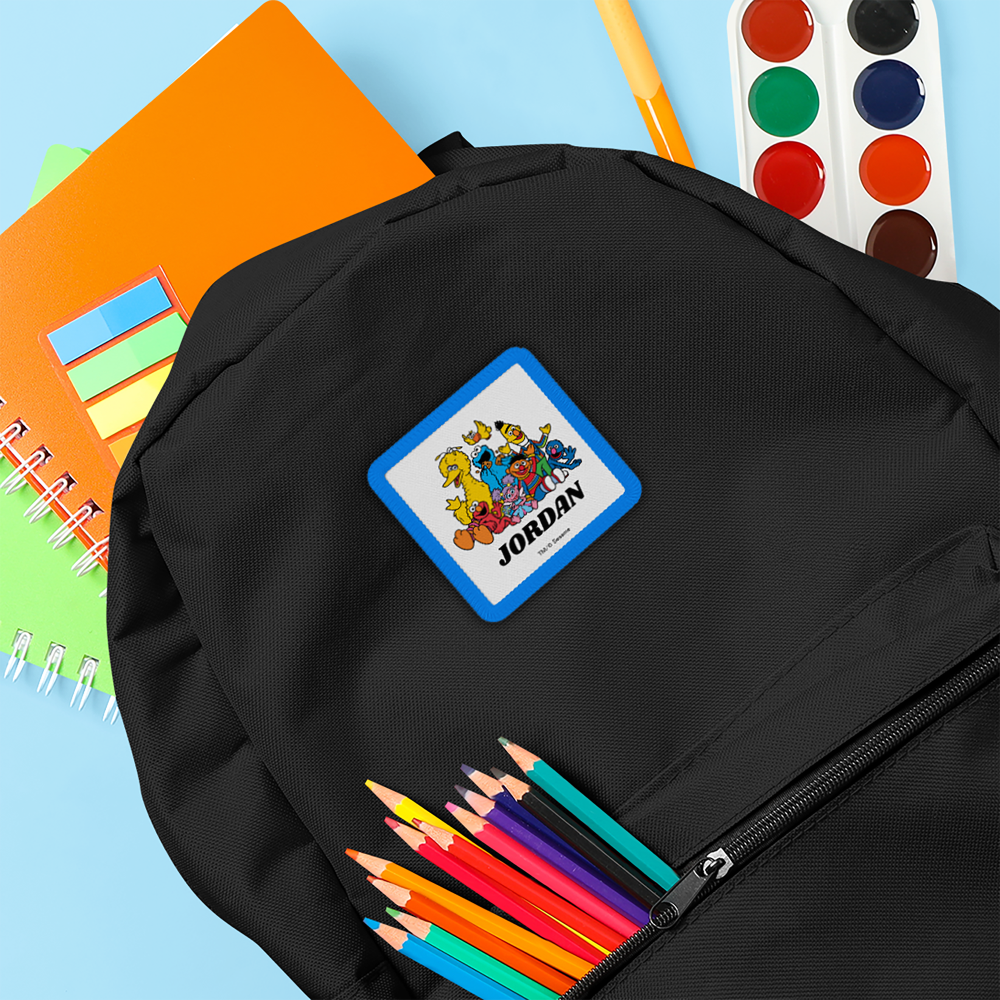
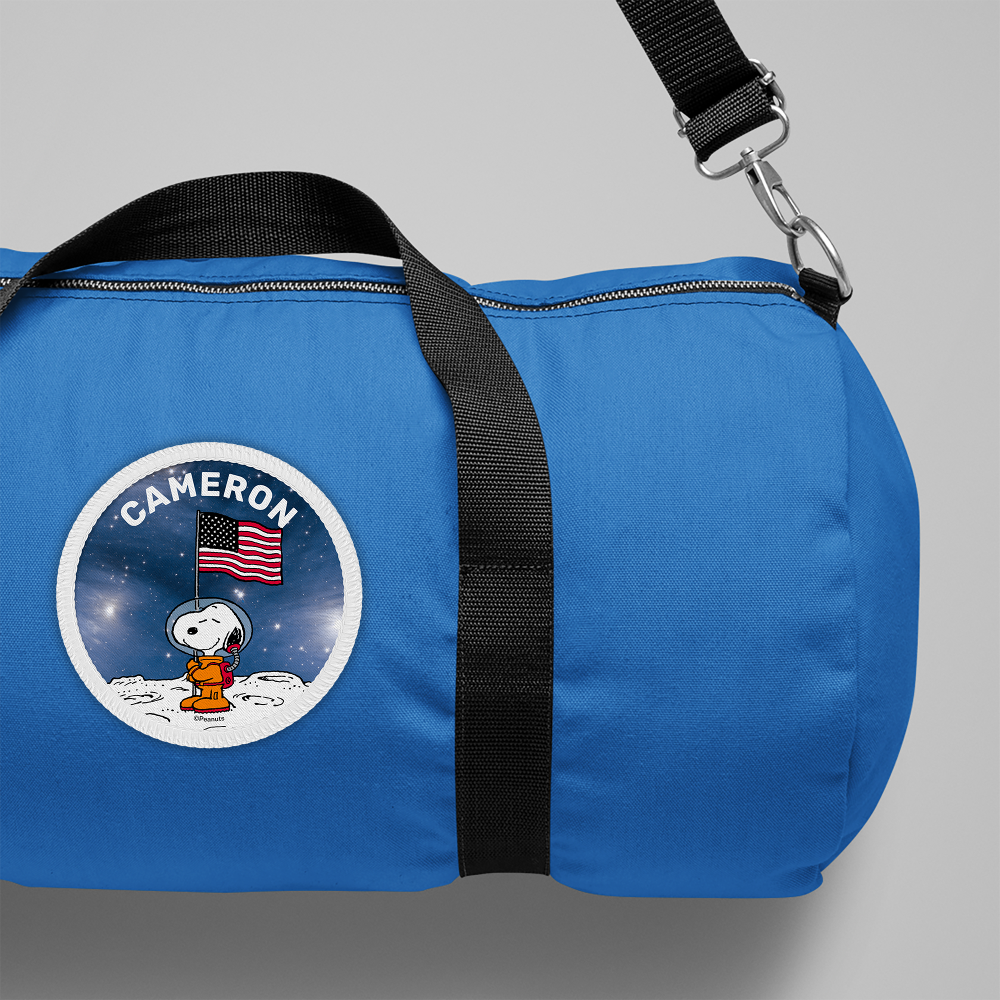
While the very prospect of adding a patch to your belongings is already a cool customization idea, it’s made even more interesting and fashionable when you consider the vast range of designs our Independent Creators have uploaded to our marketplace. To narrow your search, you can use the buttons at the top of the page to isolate particular ‘Backing Option[s],’ ‘Shape[s]’ and ‘Size[s].’ You can also look out for our ‘Editors’ Picks,’ highlighted with a yellow star, as they’ve been published by some of our most celebrated designers. Once you spot a template you’re interested in, then, follow these steps:
- Click on the thumbnail to open the page dedicated to that design. More information about the artwork, technical specifications, and Zazzle store can be found in the ‘About Patches’ and ‘About This Design’ sections, further down the page.

- Following the instructions we detailed above, make your adjustments to the ‘Design Theme,’ ‘Style,’ ‘Shape,’ ‘Size,’ ‘Border Stitching,’ and ‘Backing.’
- For ease of use, most of our designs are uploaded with a template – in other words, the Independent Creator has added stock text and photos to help you visualize what the finished product will look like, and you can swap out that placeholder information with the ‘Personalize’ button.

- If the design has not been templated – as would be the case with a design that doesn’t contain stock elements like a name or date – then you can click ‘Edit Design’ or ‘Edit using Design Tool’ to access a full complement of design features and editing tools. Ensure that you’re logged into a Zazzle account to do this, and invite others to preview your work with our ‘Collaborate’ and ‘Share’ buttons.
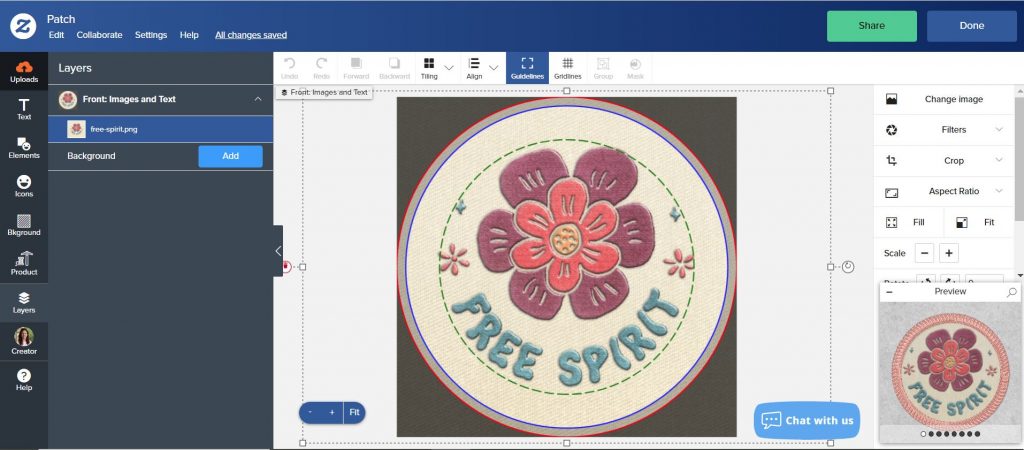
- Finally, click on ‘Done’ and ‘Add to Cart’ when you’re happy with your design. Once you input your billing and shipping information, we can start producing your order!
Can I create custom patches on Zazzle?
While it’s convenient and easy to adapt a pre-established template, we suspect that the results aren’t a patch on what you could create with a blank canvas. Whether you want to make a snarky, satirical statement, concoct branded name tags for your employees, or simply decorate a dated pair of pants, there are no limits to what you can produce in our one-of-a-kind patches hub.
- Navigate to our custom patches. Unlike the other pages we’ve hyperlinked throughout this article, there aren’t any pre-existing designs here. You should already be familiar with the shapes and sizes, however, so choose your favorite format to get started.
- Adjust the ‘Style’ settings again (along with ‘Size,’ ‘Shape,’ and so on) to refine the look and feel of your product.
- Click ‘Customize This Design’ to access Zazzle’s design tool once again. On this occasion, you’ll probably want to integrate some of the ‘Icons’ and ‘Elements’ available on the left-hand side of our design interface, or use ‘Uploads’ to search for a PDF, PNG, JPEG, or SVG you’ve been working on elsewhere.


- Repeat the process as described in our personalized patches section: register your work and save your project by clicking ‘Done’ and ‘Add to Cart’; then enter your shipping and billing information in the cart itself.
Shop Other Patches on Zazzle!


Now that you know everything there is to know about Zazzle’s patches – along with how they’ve developed, more broadly, from being a source of military pride to a sought-after accouterment – we’d love to see what you can contribute. Follow the dual processes above to either put a personal spin on an extant product or knit something brand-new together with our custom templates. And, if you happen to have any other questions about our patches, share them below, and we’ll mend that gap in your knowledge immediately!

Eoin is a Content Specialist at Zazzle in Cork. He’s recently bought a house with his fiancée, and thus most of his time these days is spent trying to keep the walls from caving in and the wolves from the door. Still, he’s always open to book, game, and movie recommendations, so if you have some, let him know: he’ll add them to a very, very long list.