
Don’t settle for average Joe. That’s not dating advice, folks; we’re talking about coffee here.
While many people favor freeze-dried instant granules, automated drip systems, and pod-based machines because of their convenience, there are far better ways to brew your morning coffee. Some of these other methods may require a little more time and effort, and they may even seem intimidating at first, but you don’t have to be a professional-level barista to get good results.
If you’d like to change things up and try a new coffee brewing method, we’re here to guide you in the right direction. We’re about to spill the beans, and give you the lowdown on everything from the V60 to the Aeropress. So stop procaffeinating, and read on!
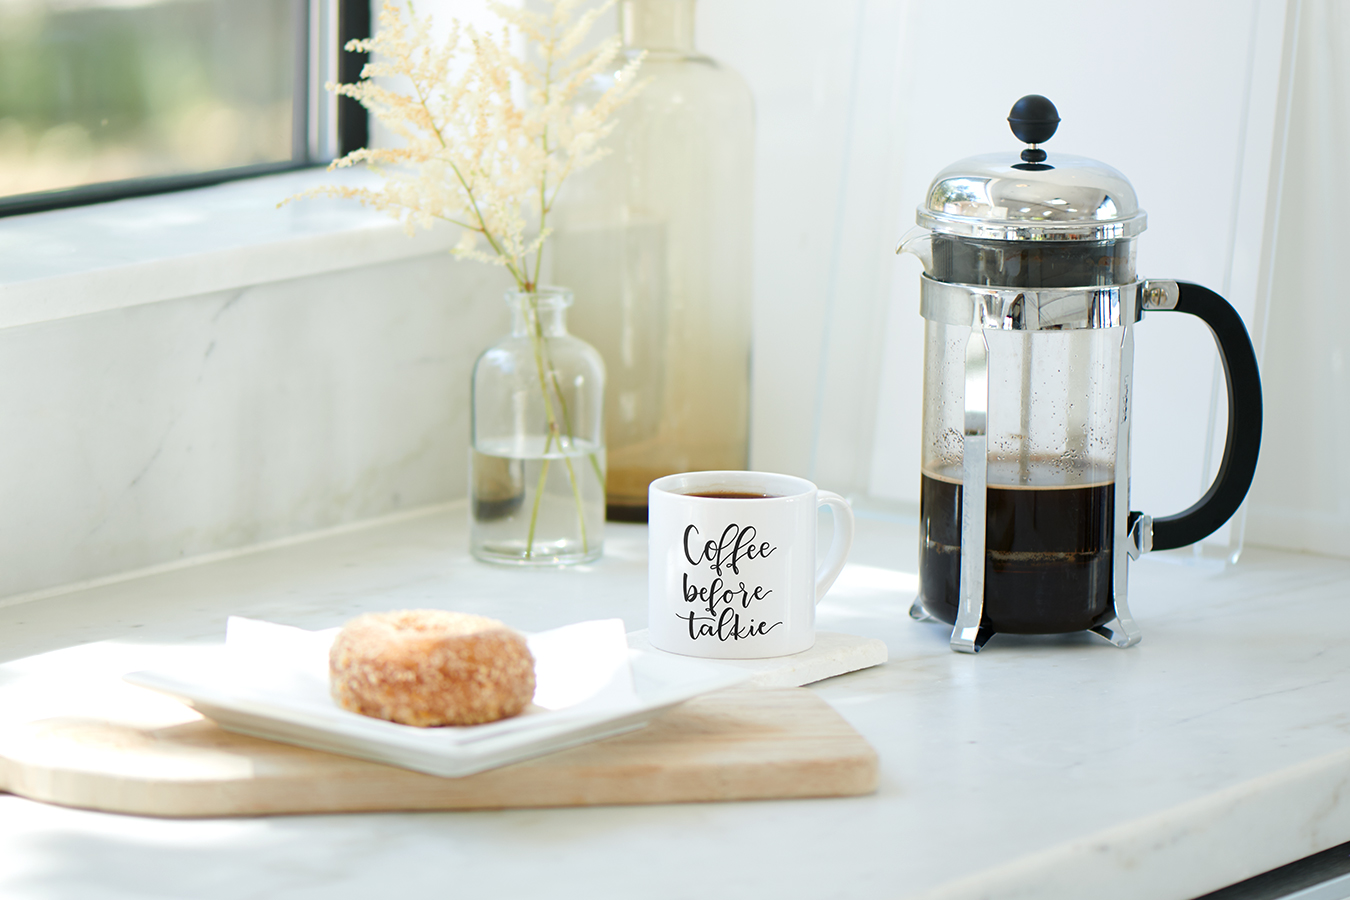
French Press
If you’d like to brew better coffee on a consistent basis, but you still value convenience, the French press is the way to go. Brewing with this classic device couldn’t be any simpler: you place ground coffee into the pot, pour hot water over it, stir gently, and place the lid onto the pot. Then, after four minutes, you push the plunger down and decant. You can make up to eight cups at a time and because paper filters aren’t needed, there’s little waste.
Though the process is hard to mess up, there are a number of factors that can influence the quality of the final brew. First, it’s important to use a medium-to-coarse coffee grind, as a finer grind can result in over-extraction and a bitter, or even astringent, taste. Second, the temperature of the water must be right. The ideal temperature is somewhere between 195 and 200 degrees Fahrenheit, so it’s best to let your kettle sit for 30-45 seconds after bringing the water to the boil. The brew ratio—that’s the ratio of coffee to water—is also key. A good rule of thumb is to hit a ratio of somewhere between 1:15 and 1:17, but you’ll see recommendations on either side of that range. Ultimately, this is a matter of taste, so you should experiment a little to find the right ratio for yourself.
The French press produces rich coffee with a robust and luscious body. The latter characteristic is what really sets this apart from other methods. The trademark texture is due to the fact that this immersion process does not filter the natural oils from the beans the way a paper filter would. However, the French press does not filter all the sediment the way a paper filter would either, so if you like a really clean brew this is not the method for you.
Pour Over
While it takes time to learn the intricacies of the next process, we think it’s worth the investment.
With this method, a paper filter is first placed into a device like a Kalita Wave, a Hario V60, or Chemex jug. Ground coffee is then placed inside the filter, before hot water (195-200° F) is poured over it in several short stages. It’s generally recommended that you start pouring at the center of the coffee bed and work your way out in concentric circles. It’s important to pour in a steady and consistent manner throughout the process. Brew time with this method is generally 3-4 minutes, the brew ratio should again be in the 1:15 to 1:17 range, and one should use a fine-to-medium grind.
Ideally, one should use a weighing scales and a goose-neck kettle to get the best results from this approach.
The pour-over method produces less intense but far more nuanced coffee than the French press, making it a go-to among coffee snobs—I mean, connoisseurs. If you’ve shelled out for high-quality specialty coffee, this technique will allow you to pick up some of the more subtle and delicate flavors that your beans have to offer.
There are few drawbacks to this method, but it does require your full attention and concentration—which might be difficult for yet-to-be-caffeinated A.M. zombies. It’s not particularly friendly to the environment either, as you’ll have to purchase paper filters quite regularly. There are, however, biodegradable varieties on the market. These are unbleached too, so your good intentions will be rewarded with better-tasting coffee.
Aeropress
Another darling of the aforementioned, ahem, connoisseurs, the Aeropress has only been around since 2005. Like the French press, this is an easy-to-use immersion brewing utensil. However, the Aeropress is far more versatile than its long-established predecessor. While it’s capable of producing intense, full-bodied brews that are not unlike espresso-based coffees, the Aeropress can also be used to bring out more subtle flavors and notes. All you have to do is vary the grind, the brew ratio, the water temperature, and the brew time.
With this method, you place fine-to-medium ground coffee into your Aeropress and pour hot water (195-200° F) over it, aiming for a brew ratio of between 1:15 and 1:17. You then stir with a spoon, place the lid on top, and wait for two minutes. Once your timer goes off, you invert the device, place it over a cup or mug, and then press the plunger. The plunging process will take 20-30 seconds.
There are a couple of minor downsides to using the Aeropress: special filters are required and you can only brew enough coffee for one cup at a time. However, there is oh-so-much to like: it’s quick and easy to use; it makes great coffee in a variety of different styles; it’s light and compact, so it’s the perfect travel companion; and the cleaning process is wonderfully straightforward.
Clever Dripper
Another relatively new product, the Clever Dripper is like a combination immersion/pour-over device. Though its conical shape makes it look somewhat like a V60, this nifty little invention actually acts more like a French press.
With this method, you place a paper filter inside the cone and add your coffee. Using a steady but aggressive pour, you then add your hot water (195-200° F). A brew ratio in the 1:15 to 1:17 range is once again advised. After two minutes, stir your coffee, and then place the cone on top of your cup or mug. Once the device is sitting atop a drinking vessel, the valve on the bottom will be pushed open and the dripping process will begin automatically. This process should last roughly 60 seconds.
If you’re a fan of the sort of strong, full-flavored coffee normally associated with the French press but would prefer less sediment in your cup, the clever dripper might be perfect for you. The addition of the paper filter means that you get a much cleaner brew without sacrificing any richness of flavor. Super-simple to use and easy to clean, the Clever Dripper is a fantastic tool for the newbie coffee brewer. The only cons are that it requires paper filters, and that it brews enough coffee for just one cup at a time.
If you’re a longtime coffee enthusiast and your favorite brewing method has been shamefully omitted from our list, feel free to leave a comment and let us know why we should reconsider. As for the rest of you, we’d encourage you to push that jar of instant coffee deep into the dark recesses of your most cavernous cubby—where it belongs. There are so many wonderful and deceptively easy methods for brewing quality coffee out there, so you should never need those flavorless little crystals again.

Seamus is a Content Specialist at Zazzle. He is quite happy in the role. So, if you’re following, that makes him a content Content Specialist. Seamus likes to write, read, watch sports, drink good beer/coffee, and spend time with his two beautiful kids. To say that he doesn’t like ketchup is an understatement.

Brewing coffee has become an art. Doing it right makes our day!