The Apple Watch is the tech giant’s most personal device yet, so it makes sense to create your own band for it! Just like you pick an outfit according to the event, you can swap the strap to match your mood or the occasion. The UV-printed, microfiber band from ‘In a Flash!’ and available to customize on Zazzle, will make any print or pattern pop. But the long tapered shape plus buckle has its own challenges too! So if you want to make your own Apple Watch Band, here are our top tips for a stylish, custom strap.
Pick the Right Size
An obvious place to start is the size. The last thing you want to do is spend ages on your design, then realize you made the whole thing on the wrong one! You can pick from two sizes: 38 mm or 42 mm, which fit the corresponding Series 1, 2, and 3 watches. If you have an Apple Watch Series 4, the 40 mm is perfectly compatible with the 38 mm band and the 44 mm with the 42 mm band.
Make It Different
If you’re making the effort to create your own Apple Watch Band, we say make it stand out! There are plenty of standard and low-cost bands on the market, but this is your chance to wear something no one has seen before. So rather than a plain color, pick an unusual print, add a monogram or something else personal like your favorite animal or even your country’s flag – designs like the U.S. Stars and Stripes or the French tricolor flag are best sellers!
Work With Your Space
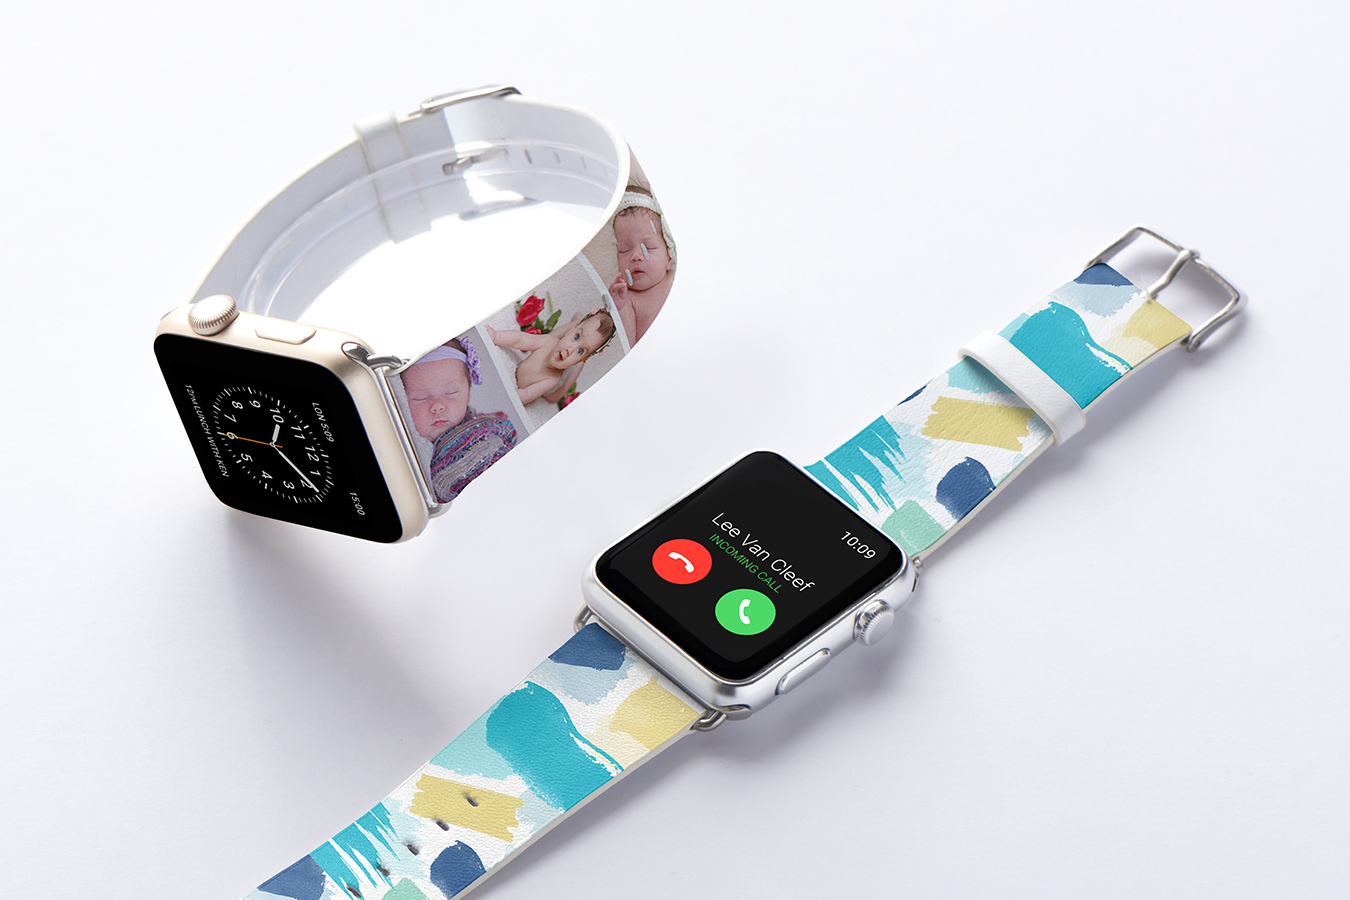
That said, some images work better than others in the design area. Wide designs or large patterns will be cut off and can become unrecognizable. Whereas small continuous prints will fit better in the space, like stripes, plaid, or animal print. Abstract and especially watercolor artwork work well because their fluid shapes make sense even if partially shown. But photos can be tricky. You’ll need to stack small pictures or simply use an existing template like this one.
Optimize Your Image
Whether you create your image in a graphic design program or scan in something you’ve drawn or painted, make sure it’s saved as a JPEG, PNG, PDF, or Adobe Illustrator (AI) format. Next, ensure your image is sized to fit the Apple Watch design area. Since there are two design areas (top and bottom part of the strap), the measurements are as follows:
- 38mm bottom strap: 0.91 inches x 4.33 inches
- 38mm top strap: 0.92 inches x 2.28 inches
- 42mm bottom strap: 0.92 inches x 4.52 inches
- 42mm top strap: 0.92 inches x 2.29 inches
Just like for any Zazzle product, we recommend a resolution of 300 dpi or higher to avoid a blurry finish. Watch out for any warning messages about low-res image files!
Know Your Lines
Due to the small, tapered space on the band, every millimeter counts! Luckily the ‘Guidelines’ button in the top toolbar is here to help. Make sure any important elements of your design fit within the green dotted line, or ‘safe print area’, otherwise they may be cut off! The blue line is where you can expect the design to be trimmed, but that can vary. So we recommend you fill the entire space up to the red or ‘bleed’ line to avoid any white borders.
Try Tiling
As mentioned, this product works well with small, continuous patterns. One way to create a print like this is to use the ‘Tiling Tool.’ If you upload a small image to your band, click on the ‘Tiling’ button in the top toolbar to repeat your image across the space in various arrangements. To add a background color, click on ‘Layers’ in the left-hand toolbar and pick a color from the panel that pops up on the right.
Make Your Mark
A simple way to customize your own Apple watch band, is to add your name or monogram. In the design view, click the ‘Text’ button in the left-hand blue toolbar. A box will pop up where you can add your text, and then play around with the font, size, and color in the right-hand panel. You can also click on the ‘Gridlines’ or ‘Align’ buttons in the top toolbar to center or align your text with the rest of the design.
Top to Bottom
Once you’ve designed the top strap, don’t forget the bottom! You can toggle to the bottom of the band by clicking the ‘Layers’ button in the left toolbar. You’ll notice that the shape of this side is longer and tapers off more than the top. So you’ll need to look at the Guidelines again even if you’re using the same image. A fun idea is to use different but coordinating designs for the top and bottom – like a pattern on one side and an accent color on the other. Note that the buckle, loop, and back of the band stay white.
Final Checks
While you’re designing your band, you can see a small preview pane on the bottom right of the screen where you can slide between different views of your band. Once you’ve clicked ‘Done,’ you’ll return the product page where we recommend you check the larger views again to make sure you’re 100% happy with everything in situ! If you’re good to go, simply click ‘Add to Cart’ to order your creation.
If you don’t want to design your own Apple Watch Band from scratch, there are plenty of amazing existing designs in the marketplace that you can customize. The above tips still apply! Either way, we hope you make a band that you love as much as the watch itself.
Matilda is Marketing Manager in the International Team, bringing Zazzle to customers everywhere from Sydney to Stockholm.