
When you’re looking for a new home décor item to spruce up your living room, a blanket or throw adds the right touch. Throw one over the back of your couch, fold it in a comfy chair, or let your kids create a blanket fort over the kitchen table.
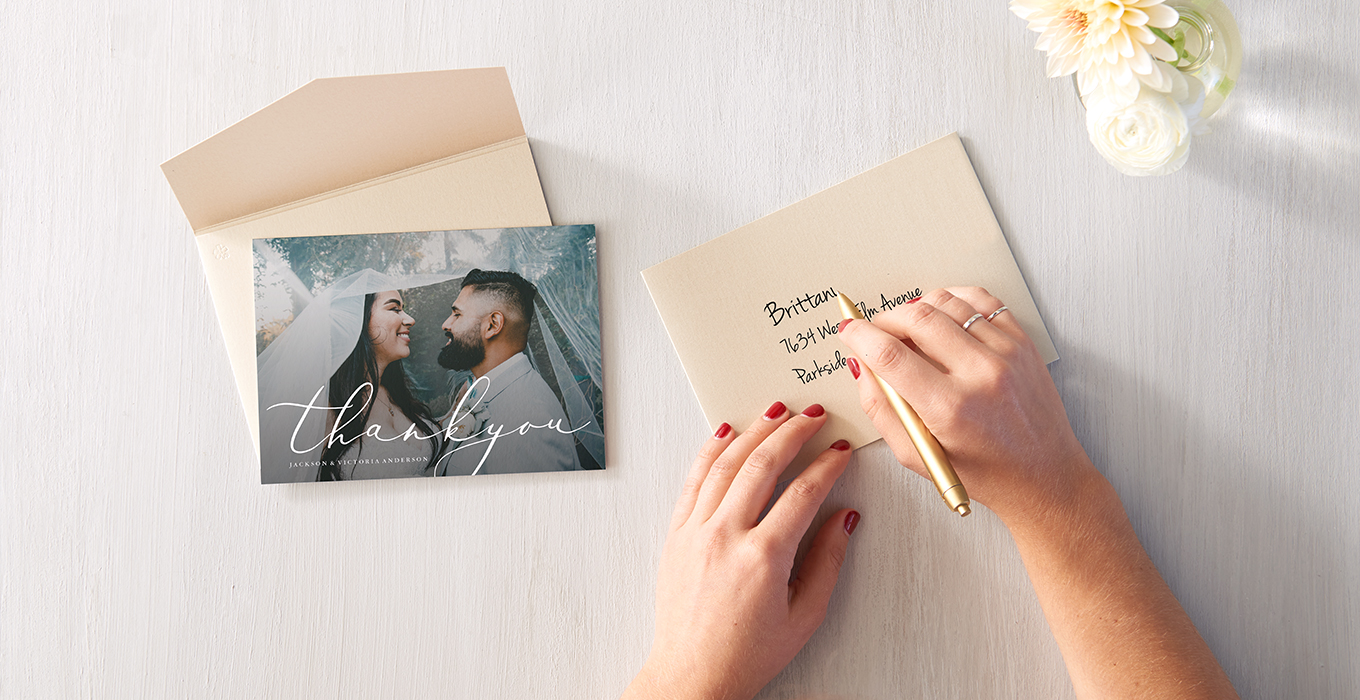
Customized blankets also make the perfect gift. Whether you’re celebrating a new grandchild, your mother, or a new college grad, a personalized blanket is the best way to wrap your arms around someone you love when you can’t be there with them.
Picture-Perfect, Personalized, Photo Blankets
Snuggle time is the best time, made for pets, children, babies, and lovers. Almost as important as your snuggle partner is the blanket you choose to curl up with.
You don’t have to be an artist, know how to use an art program, or crochet or knit to make a beautiful custom blanket. First, choose from fleece, a throw, a sherpa blanket, or a baby blanket. Upload your photo, and then add text to create a thoughtful, customized gift.
You can have any photo printed on any number of blanket designs to make the image the focus of the blanket. Choose a photo of yourself, a family photo, a couples photo, a photo of a pet, or even a landscape image of a favorite vacation place to create a one-of-a-kind blanket.
A photo of a person or people can be the focal point of a blanket on its own or an image framed by a professionally designed layout. You can also combine multiple photos within a collage layout designed by a professional artist and customized with your loving touch and creative ideas.
Tips for Perfect Pictures
The perfect blanket starts with the right image or images. Choose your photos carefully to ensure you’ll be satisfied with the end product.
- Keep it simple when you select your pic. The fewer subjects, the more the image will stand out.
- Frame the photo well. Make sure your subject is in focus, and that the background imagery enhances, rather than distracts, from the picture. A solid background is best for most photos, but a beautiful blue sky and a nature scene can also work well. Remember, when the image is enlarged for a blanket, flaws may stand out more than you’d like.
- Make sure your photo is well-lit. While shadows can make a dramatic photograph in other settings, you want the pictures on your blanket to be clear and recognizable.
- Make sure your image is high-quality. Poor quality or small (low-resolution) images can become blurry or pixelated at larger sizes.
- Want something really unique? Run your photo through a free pixel pattern program for a fun 8-bit look.
- For fun and shenanigans, or even high drama, run your photo through a filter like the ones you’ll find on Instagram or SnapChat to change the tone, making it even more unique!
It’s Not Always About Images
Making a custom blanket isn’t just about the images. With the addition of a name, you can design personalized baby blankets to present to the new little prince or princess in time for their birth. You can also turn an adorable throw into a birth announcement or a monthly milestone marker to take pictures on.
For the sports lovers out there, a customized blanket can help you show your team pride while keeping you warm and comfy in the bleachers or on the grass.
You can even celebrate things like movie night with the kids, the life of a beloved pet, service in the military, or any number of other special moments with a personalized blanket. All it takes is some imagination to create the perfect present for a loved one.
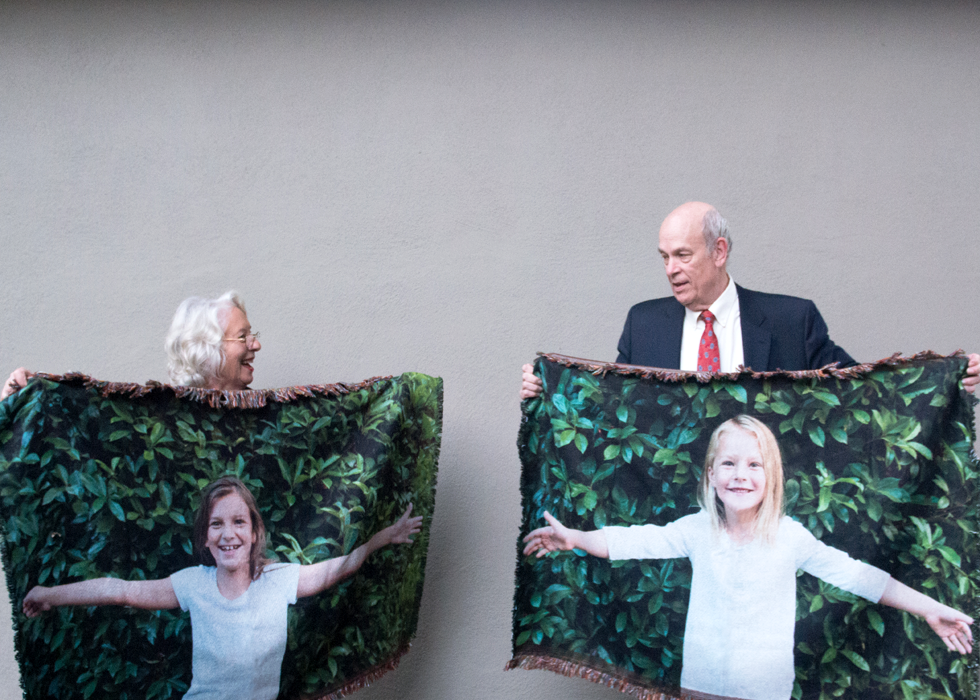
DIY Blanket – The Hug Blanket by Zazzle
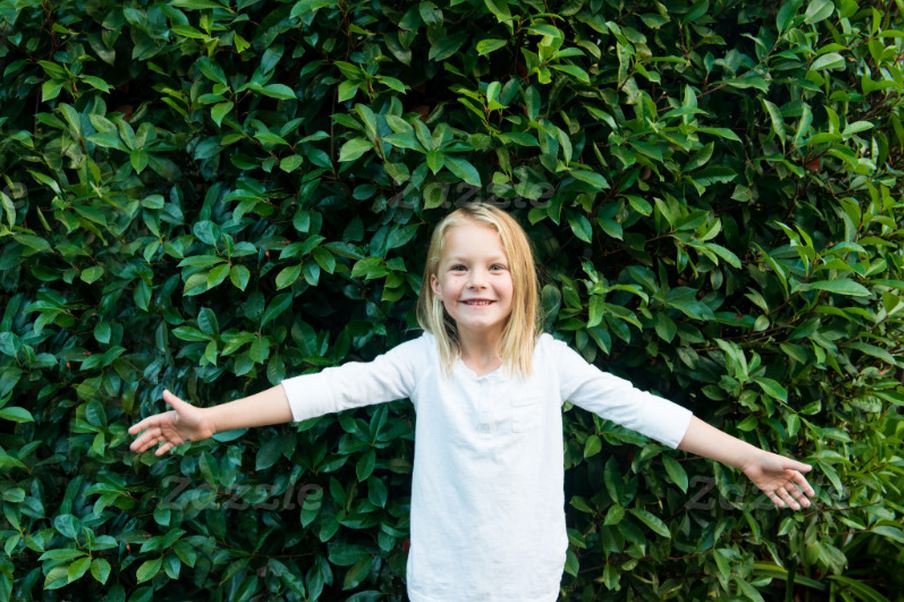
Step 1: Find a spot that has even lighting and a simple background. Snap a photo of your child with their arms outstretched, ready to give a hug. Just be sure to leave a bit of margin beyond their fingertips:
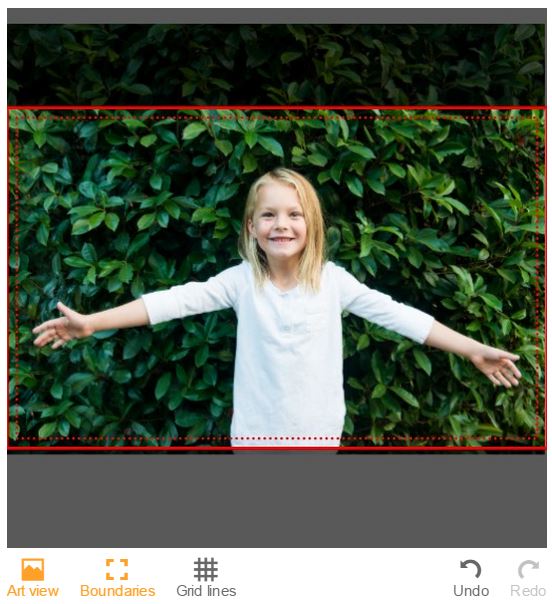
Step 2: Select the blanket that your recipient will enjoy best and use the art view to adjust your image so that it falls within the red, dotted border:
Step 3: Click “Add to cart” and wait for the thank you snap from the overjoyed recipients!

Zazzle’s Lifestyle Expert is here to help create life’s best & most important moments. Discover unique ideas and endless inspiration to create meaningful memories with family, friends and your community.